

Batch (Github) API calls with CSV and Postman runner and visualizer
By Arnaud Lauret, April 7, 2021
Do you need to make a repetitive task that could be done through an API instead of a UI? Do you need to make many API calls but don’t want to code? This post is made for you: you’ll learn to use Postman and CSV files to batch API calls. You may also learn a thing or two about API design, Github APIs (yes, plural) and other Postman features (variables, security, command line, visualizer, …) in the making. If you never have used Postman or Github APIs, no problem, everything will be explained.
About the problem and solution
While the problem and solution are quite simple, it’s a great occasion to learn many things.
The problem to solve
I think it’s Garfield, a famous philosopher, who once said Laziness is the mother of invention. Every time I have a repetitive task to do, I always try to find a way to let machine do it for me. As I’m the API Handyman, it often ends by taking advantage of an API. Recently, I had to create many issues in some random issue tracker based on some data in my emails. Hopefully, that issue tracker comes with an API and I could easily get the input data in a structure way by a simple copy/paste from my email client. So instead of having to laboriously fill N times a form, I had to make N API calls with structured data as input, and Postman can help to do that.
What you’ll learn while solving it
In order to keep this demonstration easy to redo by anyone, we’ll use the github API to create issues on a dummy public repository with data coming from a CSV file.
In this post, you’ll learn to use Postman (UI) and Newman (command line):
- Create Postman workspace, collections and requests
- Make REST GET and POST (with body) API calls
- Define and use variables
- Configure a collection to make secured API call
- Run all requests of a collection with data coming from a CSV file with Postman
- Export collections and environments
- Run all requests of a collection with data coming from a CSV file in a terminal with Newman
- Make GraphQL API calls
- Setup a visualizer to render API call results
You’ll also learn use Github REST and GraphQL APIs:
- Get a personal access token to call Github APIs (REST or GraphQL)
- Get current user data (REST)
- List a repository’s issues (REST)
- Add an issue to a repository (REST)
- Delete an issue (GraphQL)
And we will talk about some principles of API design:
- Predictable design
- Error design
- Be careful when copying others (especially famous companies)
Setting up Postman for a first Github API call
Postman is a wonderful tool that I have been using for many years to make API calls. It has constantly evolved over the years and now supports many cool features; it is now advertized as “The Collaboration Platform for API Development (note: this post is not sponsored by Postman). Go to https://www.postman.com/downloads/ to download and install Postman, if you don’t already have it. You can also use the browser version (but you’ll have to create an account). Our first Github API call will retrieve current user information.
Trying to make a first API call
Launch Postman, we’ll create a “Postman CSV Demo” workspace, a “Github” collection, a “List current user” request calling GET https://api.github.com/user (see Github REST API documentation) and make our first call:
 |
In top menu bar, click on  |
 |
Click on  button button |
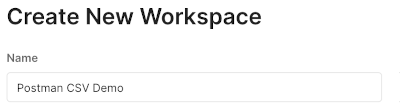 |
Set workspace name to “Postman CSV Demo” |
 |
Change visibility to “Personal” |
 |
Click on “Create Workspace” button |
 |
Click on  button next to “Postman CSV Demo” workspace name button next to “Postman CSV Demo” workspace name |
 |
Click on “Collection” item in the “Create New” window |
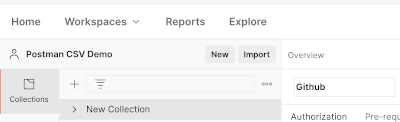 |
Change “New Collection” name to “Github” |
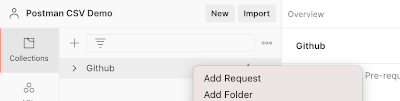 |
Right click on the “Github” collection in the left panel and select “Add request” |
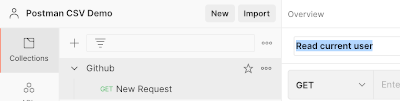 |
Change “New Request” name to “Read current user” |
 |
Set request URL to https://api.github.com/user, click on  and hit the and hit the  button … button … |
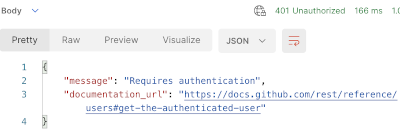 |
… to get a 401 Unauthorized error telling that authentication is required |
Getting a Github personal access token
The easiest way to get access to the Github API, if you have two factor authentication activated (and you MUST have it activated), is to generate a personal access token. For our demonstration we will generate one granting access to public repositories:
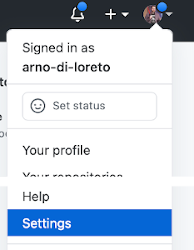 |
Go to your Github account settings by clicking on your profile icon and clicking on “Settings” (at the bottom) |
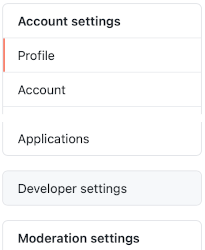 |
Scroll down and click on Developer setting in the left menu |
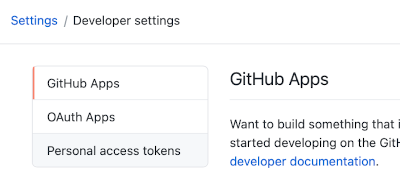 |
In developer setting page, click on Personal access tokens |
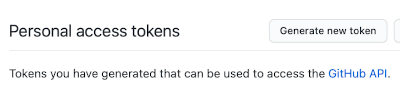 |
Click on Generate new token (you may have to provide your password) |
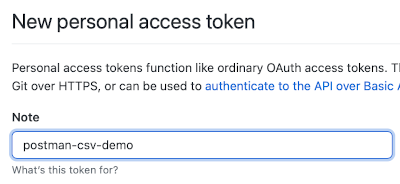 |
In the “Note” field, type “postman-csv-demo” |
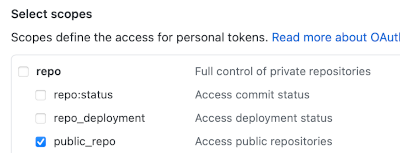 |
Check the public_repo scope under repo. Note that this scopes obviously gives access to public repositories only, if you want to access private ones, you’ll have to check the repo scope (which is less obvious). |
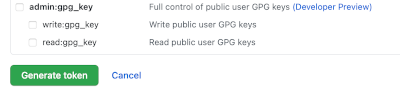 |
Click on  at the bottom of the page at the bottom of the page |
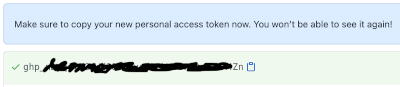 |
Copy the generated token by clicking on  (use this token with caution, never, ever, commit this value in any public source code repository!) (use this token with caution, never, ever, commit this value in any public source code repository!) |
Configuring Authorization in Postman and make a successful first API call
Having an access token, we’ll configure our collection in order to make all requests that it will contain use it. But we will do that in a secure way using an environment variable, it’s a best practice that allows to share collections without the risk of sharing sensitive data:
|
Click on button next to "Postman CSV Demo" workspace name |
 |
Click on "Environment" item in the "Create New" window |
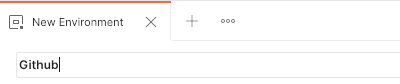 |
Change "New Environment" name to "Github" |
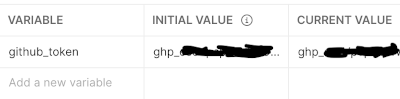 |
Add a github_token variable and paste the Github token in its initial value and click outside the field (That should populate also the current value) |
 |
Click on to save the “Github” environment and its github_token variable |
 |
In the upper left corner, click on “No Environment” and select the newly created “Github” environment in order to make its variables accessible |
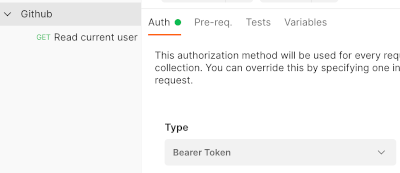 |
Click on the “Github” collection’s name, in the Authorization tab, change Type from “No Auth” to “Bearer Token” |
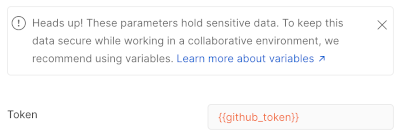 |
Set token value to {{github_token}} (If the value is red instead of orange, it means the variable is not found. It’s probably because you didn’t select the “Github” environment) |
 |
Click on (if you don’t you’ll get a 401) |
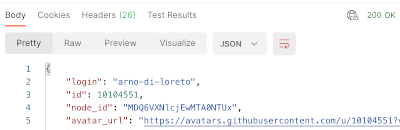 |
Go to the “Read current user” request and hit again … now it works! You should get a 200 OK response along with your user’s data. |
Creating one to many issues with Github REST API
Now that everything has been set up, let’s list issues and create one to many. We will work with a dummy repository, its URL on Github website will be something like https://github.com/user/repo. To list issues, we’ll send a GET https://api.github.com/repos/user/repo/issues request and to create an issue we’ll to send a POST request on the same URL. Using GET on a collection resource to list things and POST on the same resource to create a thing that totally makes sense, we’ll discover that unfortunately Github API does not always make sense.
Listing issues
Let’s first create our dummy repository with UI and list issues with API:
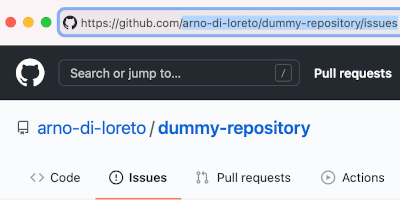 |
Go to your Github account and create a new public repository, then go to the issues tab and copy the /user/repo/issues part of the newly created repository’s URL |
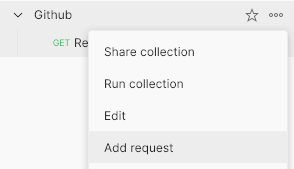 |
In Postman, click on the  button on “Github” collection and select “Add request” button on “Github” collection and select “Add request” |
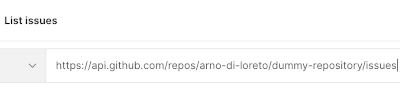 |
Set request’s name to “List issues”, in the URL type https://api.github.com/repos and paste the /user/repo/issues part of the newly created repository’s URL |
API design digression You obviously noticed that the UI URLs are similar to the API ones, in the case of Github that’s a really good idea because both UI and API give access to the exact same product and that helps developers to learn how works the API. But note that it is not always a good idea to mimic your UI in your API as it can make it less reusable in other use cases.
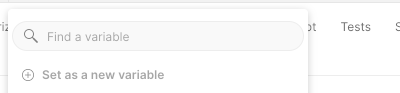
We could stop here and hit the send button to list issues, but in order to keep our request and project maintainable and reusable, we’ll replace user and repo by variables:
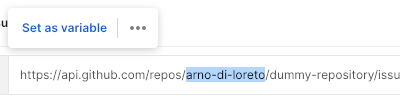 |
In the URL, select your user (mine is arno-di-loreto), a “Set as variable” menu appears, click on it |
 |
Click on “+ Set as new variable” |
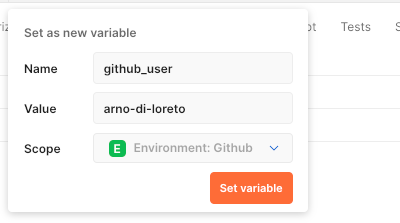 |
Set name to github_user, select “Environment: Github” scope and click on “Set Variable” |
 |
User has been replaced by the variable /repos/{{github_user}}/repo/issues) |
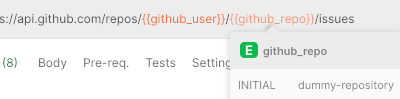 |
Repeat with your dummy repo name to create a github_repo variable in Github environment |
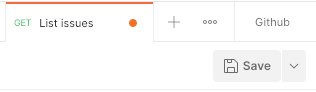 |
Don’t forget to |
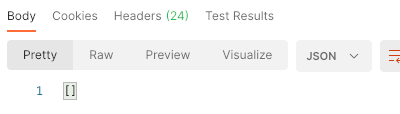 |
Now you can hit and get an empty list as response because there are no issues in the newly created repository. |
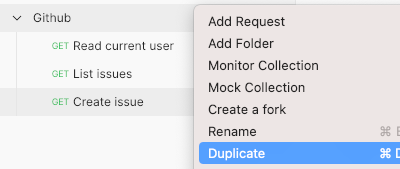
Create an issue
Let’s fill that empty issues list by creating an issue. As the Github REST API follows common practices, we are supposed to do a POST request on the same URL as the one used to list issues:
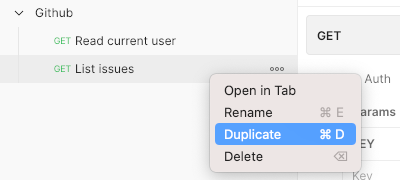 |
Right click on the “List issues” request and select “Duplicate” |
 |
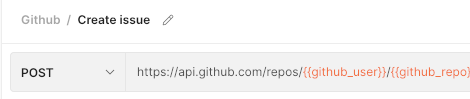
Select the newly created “List issues in repository Copy” request and change its name to “Create issue” by clicking on the pen that appear next to the request name when hovering over it |
 |
Click on “GET” to change method to “POST” and then hit the button… |
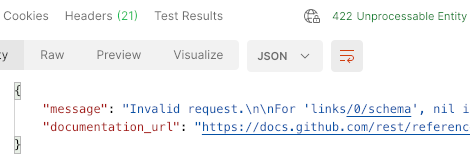 |
… Oops, there’s a 422 error! |
We actually forgot to provide some data in the body, but the error message is totally unclear about that.
An error response that don't help as much as it could
{
    "message": "Invalid request.\n\nFor 'links/0/schema', nil is not an object.",
    "documentation_url": "https://docs.github.com/rest/reference/issues#create-an-issue"
}
Such cryptic response is really an example to NOT follow, an error message must clear and help to solve the problem.
But at least, there’s a link to the documentation (documentation_url) (which is a very good idea!), if you follow it you’ll see that we need to supply at least a title and there are other data such as the body.
Let’s try set this request a body but just with the body property:
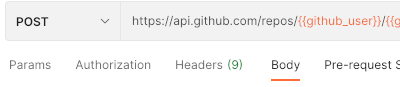 |
Go to the "Body" tab |
 |
Click on "raw" button radio |
 |
Click on the "Text" menu to select "JSON" |
 |
Add a JSON object with a “body” property set to some random string (you can copy the following sample) |
Create issue (incomplete) body
{
    "body": "Body of issue created by Postman"
}
Now, if you hit , it fails again with the following response:
An error response that actually helps
{
    "message": "Invalid request.\n\n\"title\" wasn't supplied.",
    "documentation_url": "https://docs.github.com/rest/reference/issues#create-an-issue"
}
But the error is clearer this time, we know exactly how to fix the problem: add missing title property.
Think about that the next time you design and then code an API.
OK, end of API design digression, let’s provide a valid request body with a title and a body:
Create issue (complete) body
{
    "title": "Issue created by Postman",
    "body": "Body of issue created by Postman"
}
Click on and hit one more time, you’ll get a 201 Created response containing all data of the created issue.
If you go back to the “List issues” request to send it again, you should get an non empty list containing the created issue.
Obviously, if you also go the dummy repository on Github, you’ll find that issue in the issues tab (I have to admit that I find quite satisfying to see the result of API calls appearing in UI).
Creating many github issues with Postman Runner and CSV
If you need to create many issues, you could just modify the “Create issue” request’s body and hit as many times as needed.
But that would be quite cumbersome right? What about trying the lazy way?
 |
Just in case, ensure you actually saved the “Create Issue” |
 |
Right click on the “Github” collection and select “Duplicate” |
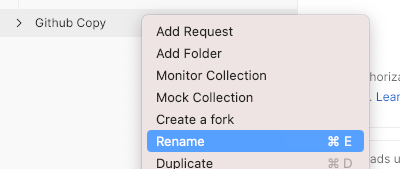 |
Right click on the “Github Copy” collection and select “Rename” to rename it “Github Batch Issues Create” |
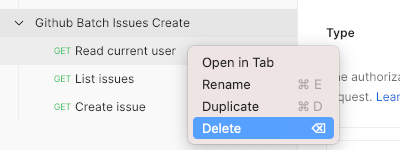 |
Delete all requests EXCEPT the “Create Issue” one by right clicking on their name and selecting Delete |
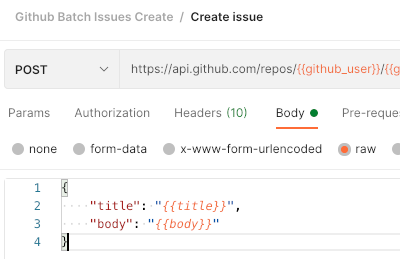 |
Select the “Create Issue” request, select the body tab and replace title and body values by {{title}} and {{body}} variables as follow |
Create issue request's body with variables
{
    "title": "{{title}}",
    "body": "{{body}}"
}
But from where will come those variables?
From a CSV (Comma Separated Values) file!
Open your favorite text editor, and put some issues titles and bodies as follow and save the file somewhere.
The first line contains the names of the variables (title and body), the other lines contain actual titles and bodies.
Issues data in CSV format
title,body
A first issue, First issue's body
Another issue, Second issue's body
Third issue,Yet another issue's body
Fourth issue,Too many issues
Five,It doesn't work
Six,It really doesn't work
Now, we will trigger one API call per CSV file line (excluding the first one which holds the variable names):
 |
Select the “Github Batch Issues Create” collection and click on the “Run” button |
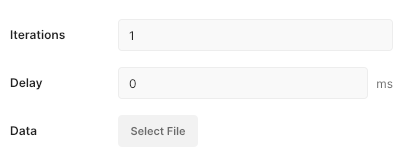 |
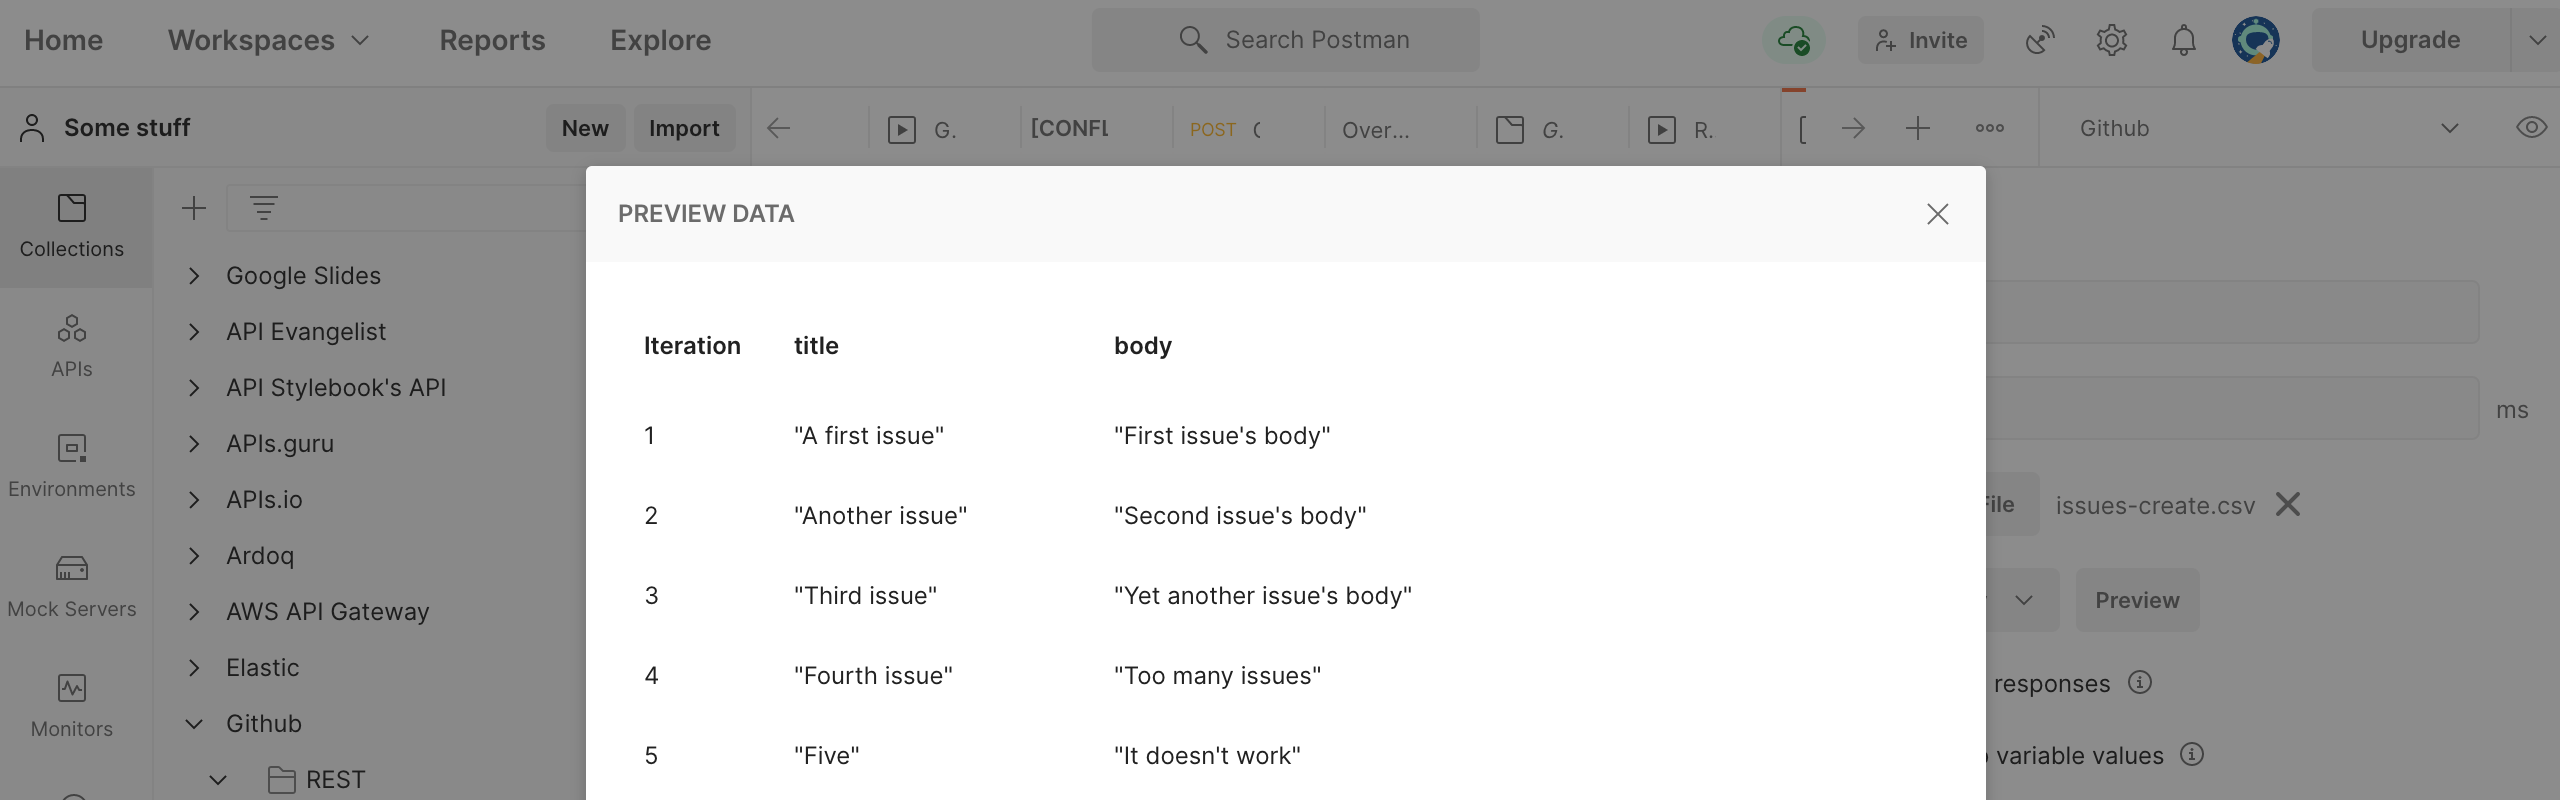
Click on “Select File” and open the previously created CSV file |
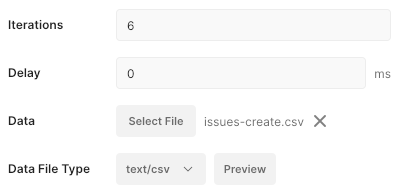 |
Note that the number of iterations matches the number of line (minus title one) in the CSV file. Click on the “Preview” button |
 |
Check that the file is correctly interpreted, then close the preview |
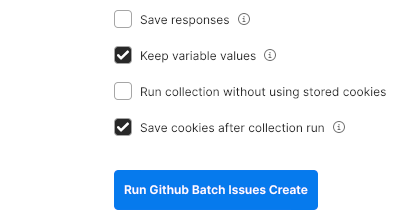 |
And finally, hit “Run Github Batch Issues Create” button |
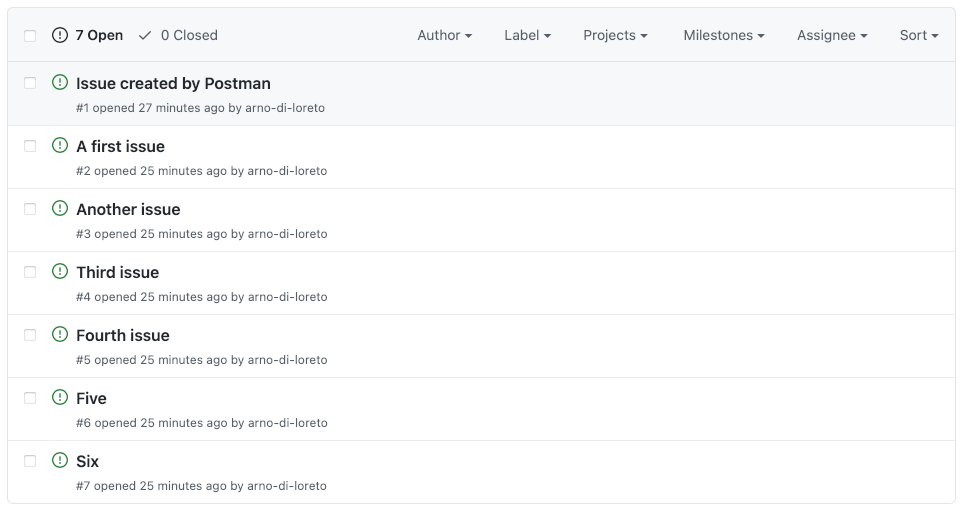
Postman will do all the work and create all the issues provided in the CSV file.
It simply makes and API call for each line, replacing the {{title}} and {{body}} variables by the value provided the CSV file’s line.
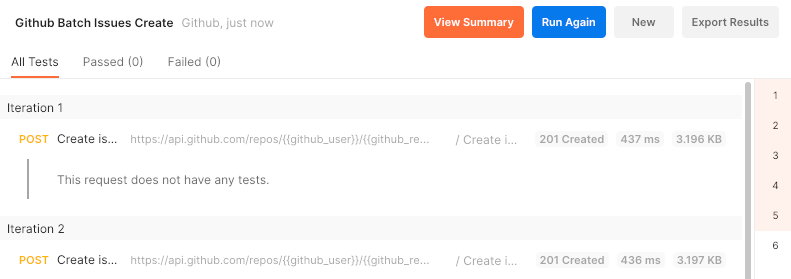
You can list issues with an API call of check Github web site to see all the created issues. Note that there are 7 issues, that’s the one created to check our Create Issue API call was actually working plus the six other ones created with the CSV file.
It works also on the command line
If you need to industrialize doing batch API calls this way, having to use UI is not really convenient. Hopefully, you can run collection on the command line using Postman’s Newman. So, let’s see how to create many Github issues using our “Github Batch Issues Create” collection and Newman.
Install Newman
You’ll need Node.js to install and run Newman.
Installing Newman is quite simple, just open a terminal and run a good old npm install -g newman and you’re done.
Check Newman documentation for more information.
Export collection and environment file
To run the “Github Batch Issues Create” collection, we obviously need the collection itself but also the “Github” environment variables, let’s export them both:
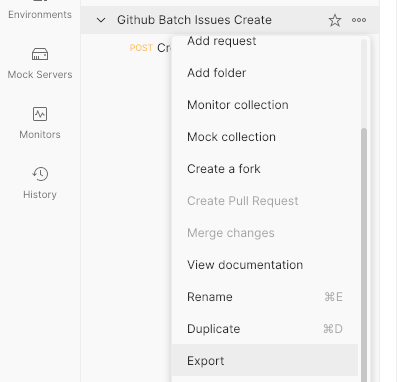 |
Click on … near the “Github Batch Issues Create” collection name and select “Export” |
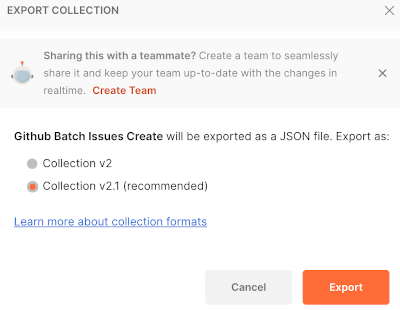 |
Keep default export format, click the “Export” button and save the collection file in the same folder as the CSV file created earlier |
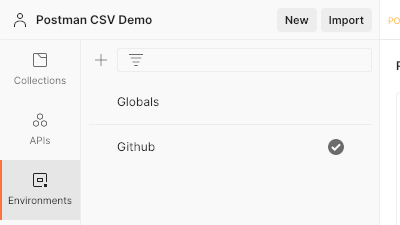 |
Go to the “Environment” tab (in Postman’s window left panel) and select the Github environment by clicking on it |
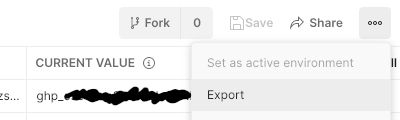 |
Click on … near the Share button (upper right corner), select “Export” and save the environment file in the same folder as the CSV file |
Creating many github issues on command line with Newman
Now, we’re all set to run the “Github Batch Issues Create” collection on the command line:
- Open a terminal
- Go to the folder containing the csv, collection and environment files
- Run
newman run collection_filename -e environment_filename -d csv_filename(with your actual collection, environment and csv filenames!)
And tada, one “Create Issue” request has been done for each line in the CSV file (again)!
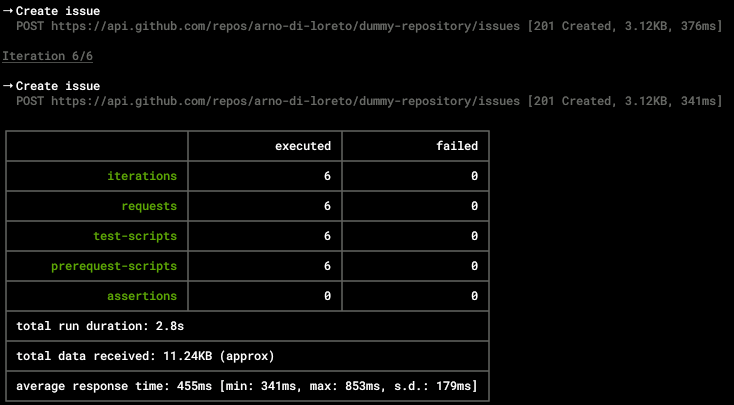
You can optionally check the newly created issued in Postman with the List issues request or go on Github. Note that as we didn’t modify the CSV file between the Postman and Newman run, the 6 new issues are the same as the 6 previous ones.
Cleaning the mess with Github GraphQL API
As an exercise you can try to delete the issues that has been created using Postman (or Newman), a collection and a CSV file containing ids of issues to delete. Do not overlook this exercise that looks quite simple but is actually not, there is a trap and a interesting Postman feature to discover.
Spoiler
The rest of this section shows how to do so (with less screenshots as by now you should know how to find your way in Postman UI).
Trying to delete an issue
As the Github API is a REST API, I assume that deleting an issue simply means sending a DELETE /issues-resource-path/{issueId} request.
To find the actual URL, let’s use the “List issues” request again, it returns something like that:
[
    {
        "url": "https://api.github.com/repos/arno-di-loreto/postman-csv-demo/issues/13",
        "repository_url": "https://api.github.com/repos/arno-di-loreto/postman-csv-demo",
        "labels_url": "https://api.github.com/repos/arno-di-loreto/postman-csv-demo/issues/13/labels{/name}",
        "comments_url": "https://api.github.com/repos/arno-di-loreto/postman-csv-demo/issues/13/comments",
        "events_url": "https://api.github.com/repos/arno-di-loreto/postman-csv-demo/issues/13/events",
        "html_url": "https://github.com/arno-di-loreto/postman-csv-demo/issues/13",
        "id": 848749267,
        "node_id": "MDU6SXNzdWU4NDg3NDkyNjc=",
        "number": 13,
        ...
    },
    ...
]
A github issue seems to have 3 “ids”: id, node_id and number, which one to choose?
No need to actually think about it because the ready to use url is actually provided!
That’s pretty handy.
And by the way it tells us that the id to use is number (with user and repo name).
Let’s try to delete the first issue in the list:
- Click on the url property’s value
- That opens a new request tab
- Hit the Send button to check what happens when doing a GET on that URL
- You actually get the issue
- Now change method to DELETE and hit send again …
That returns a 404 Not Found, does that mean this issue doesn’t exist?!
Obviously not, because a GET on it actually returned something.
Let’s check what the documentation says (link provided in documentation_url), look for Issues in the left navigation bar.
Actually, you can’t delete an issue with Github REST API!
Seriously, don’t do that at home, use HTTP protocol correctly, never, ever return a 404 Not Found when a method is not available, return a 405 Method Not Allowed instead.
Actually deleting an issue
Hopefully there are 2 Github APIs: the REST one and the GraphQL one.
And you can delete issues with Github GraphQL API using the deleteIssue mutation.
And even more hopefully, you can use the same token to access both APIs.
I will not go into details about GraphQL. For what we need to do today, you only need to know that to send requests to a GraphQL API you always use a POST request and tell what you want to do in the body using GraphQL query language. In GraphQL, a request can contains many queries (to read data) and mutations (to modify data), actually mutations can be seen as functions. You can read my And GraphQL for all post to learn more about GraphQL.
Let’s try to use this deleteIssue mutation:
- Select the “Github” collection
- Create a new “Delete issue (GraphQL)” request
- Set its method to “POST”
- Set its URL to
https://api.github.com/graphql - Go to the “Body” tab
- Select “GraphQL” radio button
- Paste the following GraphQL body
Delete issue GraphQl request body
mutation {
    deleteIssue(input: { issueId: "but which id put here?" }) {
        repository {
            name
        }
    }
}
The question is, which id should we provide in the issueId property?
We have seen in the REST API that an issue has 3 different ids, for example:
id:848749267node_id:MDU6SXNzdWU4NDg3NDkyNjc=number:13
As the request does not provide the repository name, that excludes the number as its value is probably not universally unique across all repositories of all users.
The id and node_id could be that unique.
Try to set issueId with one of the id of your issues and hit the send button.
You’ll get this 200 OK response (sigh… HTTP is only used for transport with GraphQL APIs):
Error
{
    "data": {
        "deleteIssue": null
    },
    "errors": [
        {
            "type": "NOT_FOUND",
            "path": [
                "deleteIssue"
            ],
            "locations": [
                {
                    "line": 2,
                    "column": 5
                }
            ],
            "message": "Could not resolve to a node with the global id of '848749267'"
        }
    ]
}
As node_id is the only one left and as the error message talks about “node”, it seems to be the expected value.
Try again, and now you’ll get another 200 OK signifying that the issue has been deleted.
Issue deleted!
{
    "data": {
        "deleteIssue": {
            "repository": {
                "name": "dummy-repository"
            }
        }
    }
}
Note that this response contains the name of the repo that was holding the deleted issue. Now that you know how to delete an issue, it’s quite easy to delete all the issue you have created. I will just give you one last tip.
One last tip: “Generating” CSV file with Ids in Postman
To delete multiple issues using the method we have been using to create them, you need a CSV file containing the ids of the issues you want to delete.
You could list issues using Postman and copy/paste them one by one in that file.
You could also use the powerful JSON command line processor jq (see my post series about it)
But what about “generating” that CSV in Postman?
To do so, we’ll use the Visualize feature of Postman. By adding some Javascript code in the Tests tab of a request you can setup a visualizer for the returned data. That can be used to create awesome charts or more simple tables, this is what we’ll do here.
Go the the Tests tab of the “List issues” request in “Github” collection and copy/paste the following Javascript code:
Setup visualizer in Tests tab
// Handlebar template
var templateIdsOnly = `
    <table bgcolor="#FFFFFF">
        <tr>
            <th>issueId</th>
        </tr>

        {{#each response}}
            <tr>
                <td>{{node_id}}</td>
            </tr>
        {{/each}}
    </table>
`;

// Set visualizer
pm.visualizer.set(templateIdsOnly, {
    // Pass the response body parsed as JSON as `data`
    response: pm.response.json()
});
This Javascript code creates a templateIdsOnly Handlebar template.
This template is pretty basic, it builds a HTML table with a single column title issueId.
This table will contain a line line holding the node_id value of each item returned by the API call.
After that it configures the Postman visualizer (pm.visualizer) to use the template on the API cal response data (pm.response.json()).
Once this is done, hit the Send button and click on Visualize in the response and tada, you get a one column table with its node_id title and all node_id values:
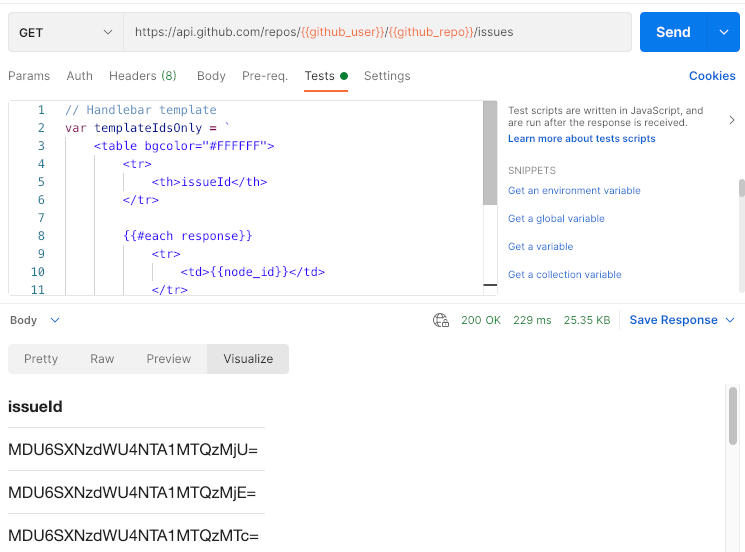
Just select all text and copy/paste it in a file that you’ll use as input to delete all issues.
Obviously, in our case as we need a single value for each request, that is not really a CSV file that has been “generated”. If you need to get multiple value, just add a comma and the new value in the template (don’t forget title) as follow
Actually generating CSV data
// Handlebar template
var templateCsv = `
    <table bgcolor="#FFFFFF">
        <tr>
            <th>issueId,body</th>
        </tr>

        {{#each response}}
            <tr>
                <td>{{node_id}},{{body}}</td>
            </tr>
        {{/each}}
    </table>
`;

// Set visualizer
pm.visualizer.set(templateCsv, {
    // Pass the response body parsed as JSON as `data`
    response: pm.response.json()
});
From now on, you have all you need to delete multiple issues with the runner in Postman or with Newman.
Delete access token
Once you’re done, beware to not commit the environnement file with active access token. I recommend deleting your Github access token if you don’t use it anymore. Go to your Personal Access Token list on Github and click on the “delete” button for the “postman-csv-demo” token.
Lessons learned
I hope that the next time you’ll need to batch API calls, you’ll remember what you’ve seen in this post. Doing CSV data based API batch calls is pretty simple once you know that feature exists in Postman (and in its command line counter part Newman). The visualize feature can be really useful too in that case but it can be used to do far more advanced data rendering. And don’t forget to use environment variables to store sensitive data in Postman.
I hope that you’ll also remember the few design principles and errors that we have seen:
- Being consistent with common practices (and HTTP/REST principles), ease learning to use an API (people can guess how to use APIs)
- Including link to documentation is quite useful
- Never return unclear error that does not help to solve the problem
- Never return 404 Not Found status code when an HTTP method is not available on an actually existing resource, use 405 Method Not Allowed instead
- Having consistent URL between UI and API can be a good idea but not always (it may make API less reusable)
And last but not least, we’ve seen that even famous companies such as Github can make mistakes with their APIs. That means that you must be careful when taking inspiration from existing APIs. Hopefully, in the case of Github, the problems don’t have much consequences, the API is overall of good quality and usable (and the documentation is quite good), but be careful not to ruin developer experience with more terrible mistakes.